| Importing DXF Terrain and Matched DXF Objects into WCS5 | |||||||||||||||||||
|
As discussed in another tutorial, the best way to place a complex collection of 3D Objects is to export the WCS terrain and use it as a reference on which to model your 3D Objects. That's great if you're creating the scene from scratch, but what if you already have the entire scene in a program like AutoCAD? You'll need to export the terrain and objects as DXF files. Before doing that, you have some work to do it the native program. I'm using AutoCAD as an example.
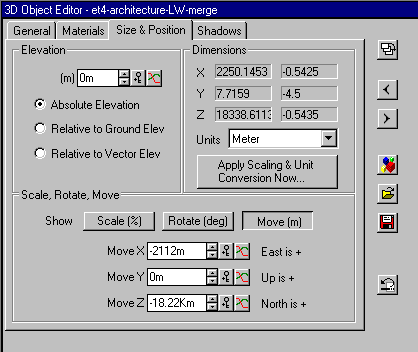
The story thus far The original data on which this tutorial is based came from AutoCAD. The lower left corner of the AutoCAD terrain in plan view was 2112 meters east and 18220 meters north of the origin. The goal was to import the AutoCAD terrain into WCS5, grid it, and place AutoCAD buildings on the terrain in their correct locations. How to do it 1. Create a new project in WCS. When asked, click Yes to the Import Data question. 2. Before continuing with the Import Wizard, open the Preferences Project page and change the Latitude and Longitude to 0º. When we import the DEM, this will place its lower left corner at 0º latitude and 0º longitude. 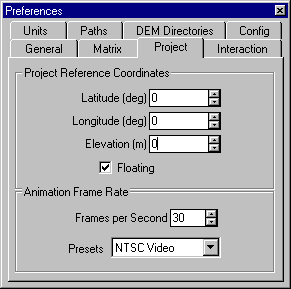 3. Import Wizard LOAD AS page. Select Control Points if they're not already selected. 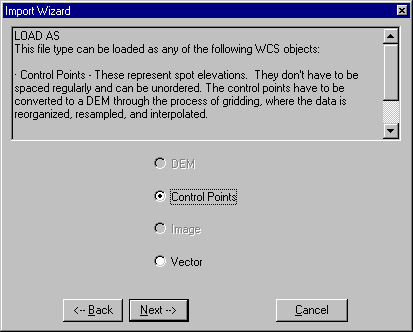 4. Import Wizard HORIZONTAL COORDINATES page. Select Arbitrary. 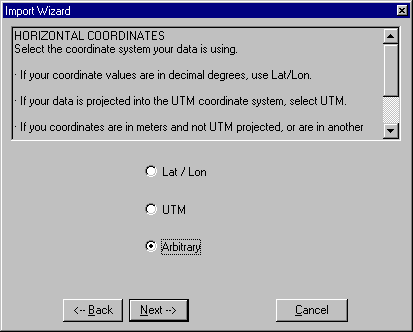 5. Import Wizard REFERENCE COORDINATES page. Select Place Low X,Y at Reference and check X (Lon) + to East. This tells WCS to place the lower left corner of the DXF we're importing at the reference coordinates, in our case 0,0. 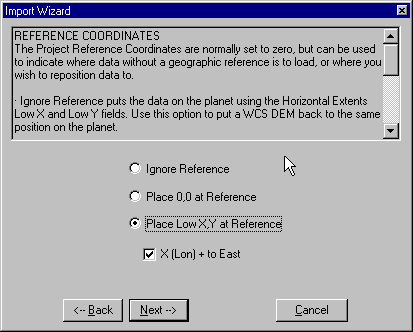 6. Open an overhead camera view. Zoom into the lower left corner of the terrain, make a preview render, and check the elevation of the corner in the Diagnostic Data window.
7. Launch the Import Wizard again and select the DEM we just gridded. 8. Import Wizard DATA POSITIONING page. Select Change Settings. 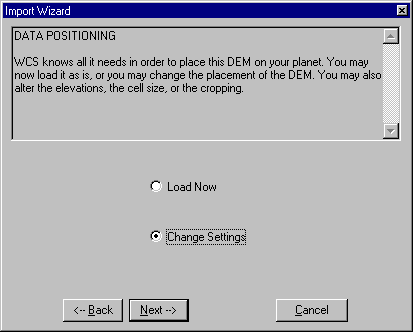 9. Import Wizard VERTICAL EXTENTS page. Enter the elevation shift in Datum Change. This will lower all elevations. In
this example, the imported terrain was 13.25 meters too high
so a 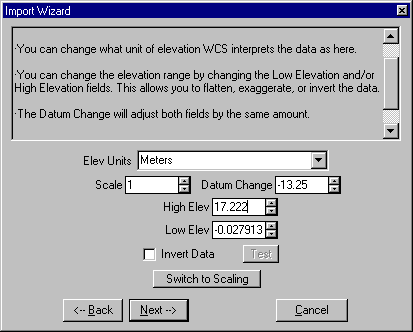 10. Disable the original DEM in the Database Editor. 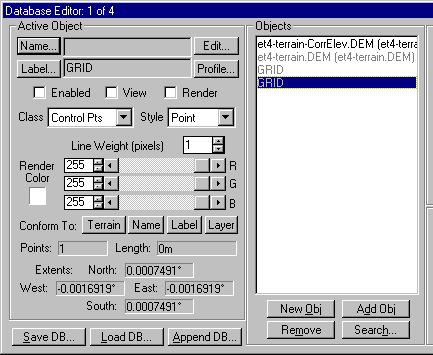 11. Go to the 3D Object Task Mode, select the 3D Objects category, and click the Create button. Click anywhere over the terrain in a view to place a vector for the object. We'll change its location shortly. Close the Component Gallery when it opens. 12. Load the 3D Object DXF in the 3D Object Editor. 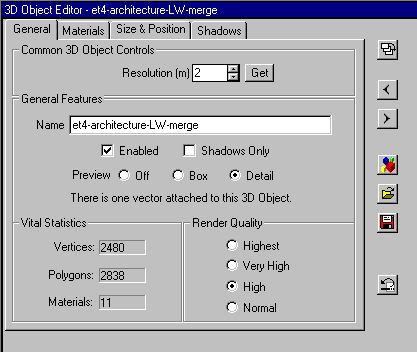 13. Open the Vector Editor for the vector you just created. Change the X, Y and Z values to 0 in the Active Point(s) section. This will move the vector to the 'origin' of our WCS world. 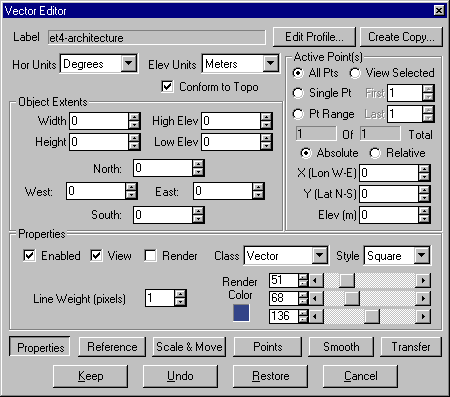 14. Go to the 3D Object Editor Size & Position page and click the Move button to access the Move values. Remember the lower left corner AutoCAD coordinates I had you note before we started? Enter the negative of the west-east coordinate in the Move X box and negative of the north-south coordinate in the Move Z box.
 15. The 3D Object should now be correctly positioned on the terrain. 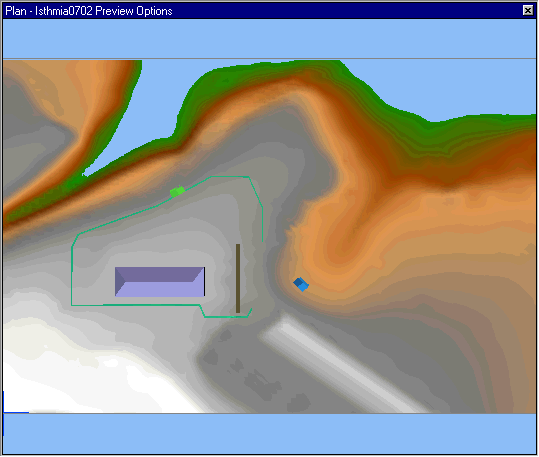 |

Copyright ©2001 R Scott Cherba All Rights Reserved