|
|||||||||||||||||||||
|
For areas of the world where 90-m terrain data is not available, SRTM-3 offers a low-cost solution. This tutorial covers the import of a single tile, however, the method is most useful when importing many tiles. The VNS 2 DEM Merger allows you to merge and fill data voids in a few simple steps.
1. This tutorial uses SRTM data available for FTP download at ftp://edcsgs9.cr.usgs.gov/pub/data/srtm/.  2. I'll be using the N00W078.hgt.zip SRTM file downloaded from ftp://edcsgs9.cr.usgs.gov/pub/data/srtm/South_America/. You'll need to adjust the VNS import settings appropriately for your data. 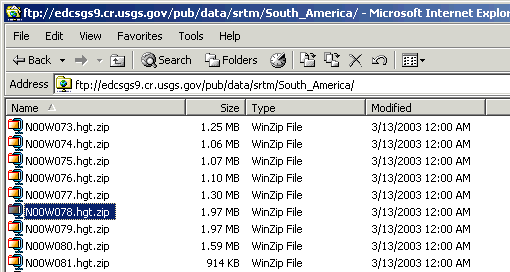 3. Extract the zip to yield the N00W078.hgt file. 4. Your first stop before doing anything with new data is the documentation or metadata. If you go to the root SRTM directory at ftp://edcsgs9.cr.usgs.gov/pub/data/srtm/, you'll find a Documentation directory. 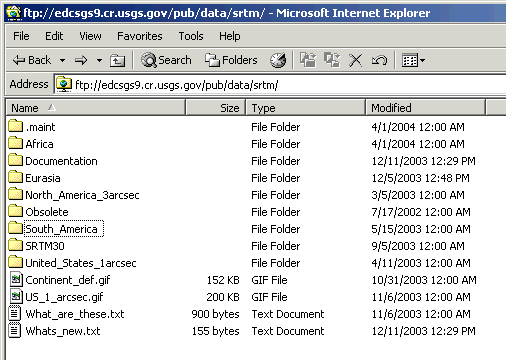 5. The SRTM_Topo.txt file gives us all the information we need to import the SRTM-3 (3 arc-second or about 90 m) data.
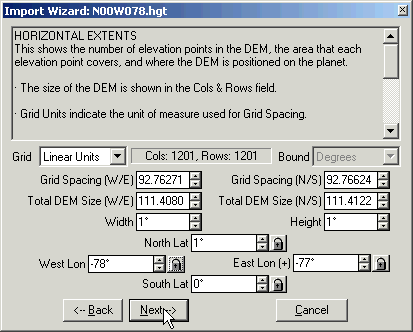
6. Create a new project and import the N00W078.hgt file. The Import Wizard will identify it as a binary file. 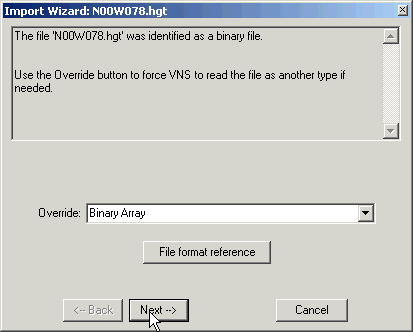 7. Accept the LOAD AS window defaults. 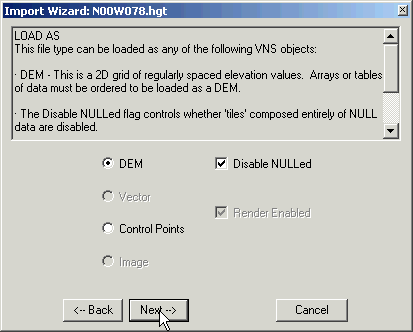 8. Accept the OUTPUT FILE TYPE AND NAME defaults. 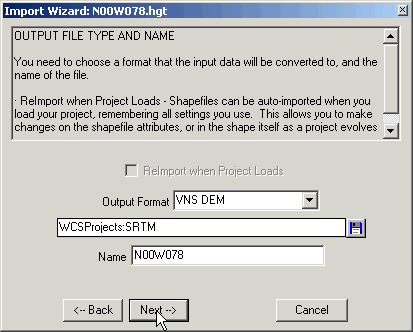 9. The COORDINATE SYSTEM SUMMARY window will open the Coordinate System Editor, seeking guidance. Go to the System page and choose Geographic - WGS 84 from the System dropdown box. 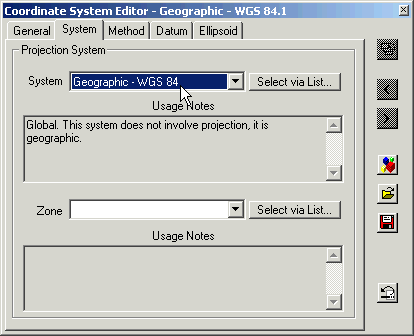 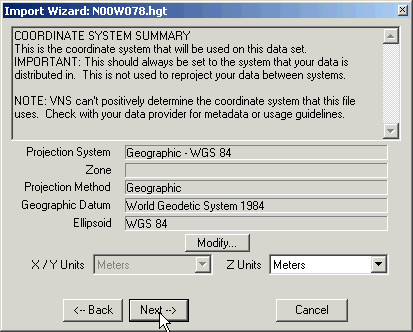 10. BINARY INPUT SETTINGS window. Choose Two Value Bytes and the High-Low/Motorola/Big Byte Order. These settings came from the SRTM_Topo.txt file. 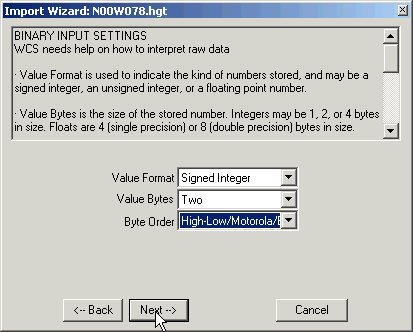 11. Accept the defaults in the INPUT COLUMNS, ROWS, AND HEADER window. 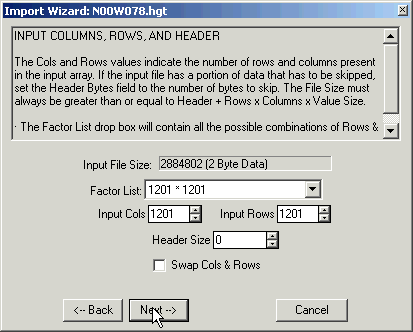 12. Accept the defaults in the REFERENCE COORDINATES window. 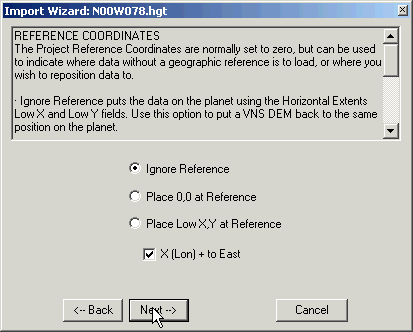 13. HORIZONTAL EXTENTS window. According to the SRTM_Topo.txt file, the filename is the lower left corner of the 1º x 1º block. A little simple math gives us the following extents.
 14. Accept the defaults in the PRE-PROCESSOR SETTINGS window. 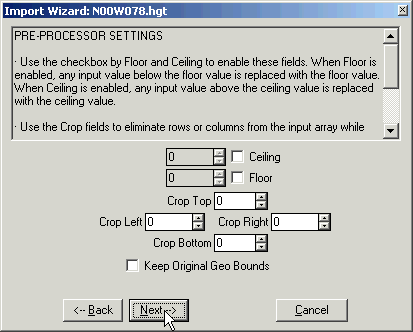 15. NULL DATA window. According
to the SRTM_Topo.txt file, the data has voids with NULL
data 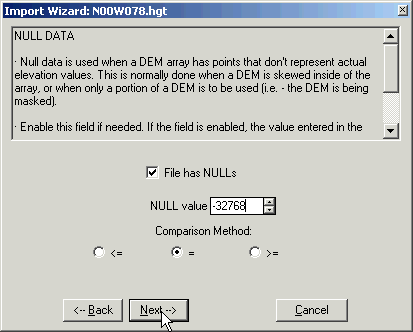 16. Accept the defaults in the VERTICAL EXTENTS window. 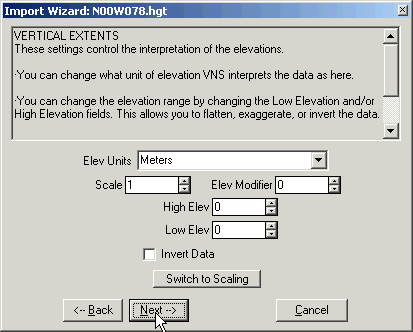 17. OUTPUT DEMS window. Make 1 tile for easy merging when importing many tiles. 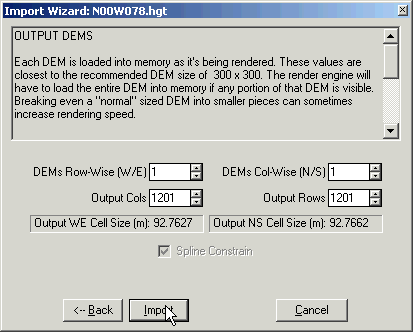 18. Make this Coordinate System the default. 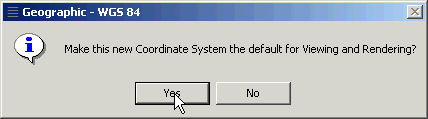 19. Here's what the imported data looks like in a planimetric camera view. 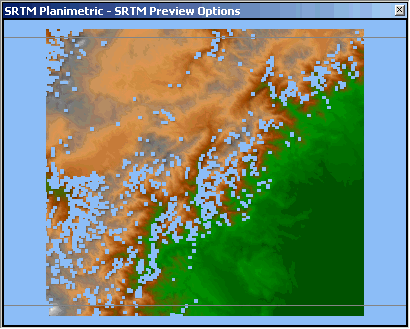 20. Create a Search Query that finds all enabled DEMs. Select Items Now to check your query. The Database Editor should open with the DEM selected. 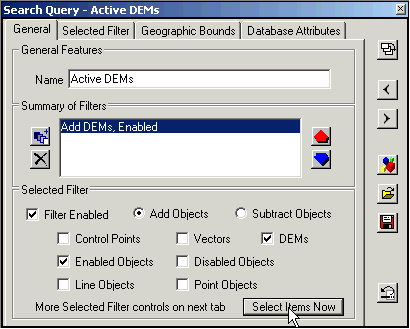 21. Add a DEM Merger that uses the Active DEM SQ. Update bounds. Perform Merge. 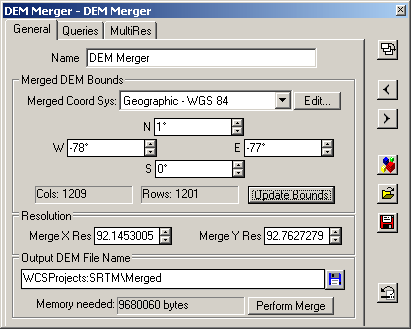 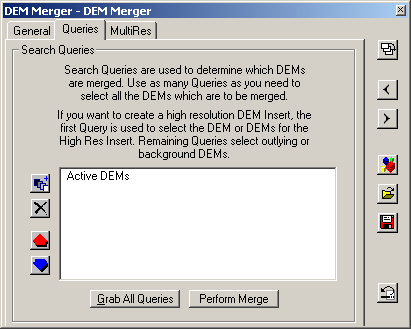 22. Disable the original DEM in the Database Editor. 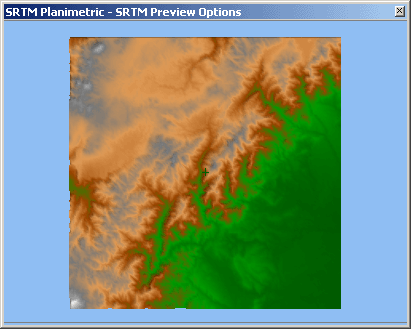 |
|||||||||||||||||||||
 Copyright 2004 R Scott Cherba All Rights Reserved |